In Part 1 of “How to Replace Window … Again” (PR, May/June 2022), we followed David Joyce’s careful process of removing a double-glazed tilt-in replacement window while preserving both the plaster on the inside and the housewrap and insulation layers on the outside, then prepping the opening for a new, slightly larger, flanged triple-glazed window.
Here in Part 2, we’ll look at what it takes to install the new window, tie it back into the housewrap and insulation, and retrim both sides of the opening.
Sealing the Window to the WRB
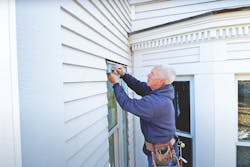
Compared to everything Joyce has done to this point, installing the window is a piece of cake, even working solo. He lines up the center marks on the window and the housewrap, checks the head for level, and, because there’s no one inside holding the window, pops a nail into the nailing flange at the upper corner. After checking the jamb for plumb, he pops a second nail into the same flange at the bottom corner.
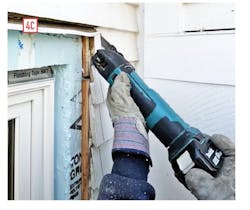
Then, after measuring diagonally to confirm the window is square, he fastens the rest of the window flange. After heading inside to make sure the window is where he wants it (it is), Joyce heads back outside to seal the window to the flap of housewrap he was careful to preserve when he cut out the old window [1].
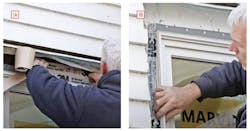
Then he heads back inside to prep the window for trim. The first step is to press a thick strip of backer rod into the airspace around the window frame, followed by spray for insulating and air sealing [2].

“The purpose of this backer rod is to maintain our drainage plane for the exterior,” he explains. “If water was to leak in behind our robust flashing, it can drain in the space created by the backer rod.”
Otherwise, the spray foam he uses to fill the voids around the window will stick to the back of the window flange, blocking the path for water to drain out the bottom.
RELATED: How to Solve the Deck Ledger Problem in Fat Walls
Putting the Puzzle Back Together
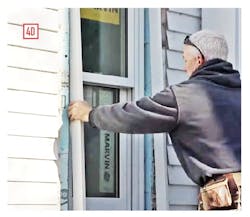
With the interior side ready for trim, Joyce heads back outside to button up the exterior. The first step is to replace the foam jigsaw puzzle pieces that he surgically removed when he removed the old window [3].
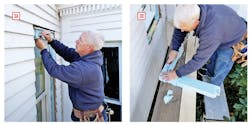
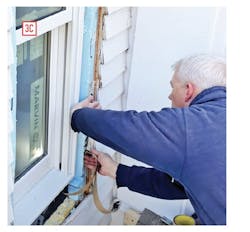
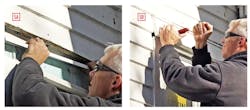
Next, he cuts back the clapboards [4] because the new AZEK trim is the same width as the old wood trim, but the new window is bigger than the old one. Next, he measures for the PVC extension jamb, cuts and assembles the pieces, and dry fits it at the window to mark the siding for one last cut at the sill horns.


Before fastening the extension jamb in place, he sprays the newly exposed edges of the wood siding with primer.
The last step is to install the casings, which are screwed in place and finished with Cortex plugs. Before installing the head casing, Joyce cuts a piece of metal flashing to size and slides it behind the furring strips [5].

“You can’t really tape the top of the flashing to seal it to the foam, which is the drainage plane,” Joyce explains. “But most of the water that might leak into this wall will be directed out with this flashing.”
And because he just opened the wall and inspected the inner layers, he’s pretty confident that there’s not much water leaking in anyway. And the little bit that does quickly finds its way out.
One down, 37 to go.
About the Author

Sal Alfano
Executive Editor
Sal Alfano is executive editor for Professional Remodeler. [email protected], 202.365.9070