flexiblefullpage - default
interstitial1 - interstitial
Currently Reading

How to Replace a Window in a Fat Wall (Part 1)

Advertisement
billboard -
Construction

How to Replace a Window in a Fat Wall (Part 1)

Jobsite Know-How details how to install a window... again. This time it’s in a fat wall wrapped with an air barrier and exterior rigid insulation


By Sal Alfano June 13, 2022
how to install a window
Images courtesy David Joyce | How to Install a New Flanged Window in an Old Wall
This article first appeared in the May/June 2022 issue of Pro Remodeler.

About 30 years ago, Betsy Pettit and Joseph Lstiburek oversaw an exterior insulation retrofit to their classic New England home. After the siding and trim were stripped off, the sheathing was covered with housewrap taped at the seams and a continuous layer of 2-inch rigid XPS foam. The new clapboards were fastened to ¾-inch furring strips screwed through the foam into the framing to form a rainscreen cladding system.

If those specs seem a bit ahead of their time for the early 1990s, it’s because Pettit and Lstiburek are the founders of Building Science Corporation and two of the most influential building scientists in North America.


RELATED: How to Solve the Deck Ledger Problem in Fat Walls


The original single-pane windows had been replaced with tilt-in double-glazed units before the exterior foam retrofit, but recently, Pettit and Lstiburek decided to replace them again with flanged triple-glazed double-hungs from Marvin. Replacement windows typically fit inside the existing window frame, which reduces the viewable area, but here, the glazing area will increase because the original frame will also be removed to recapture the space occupied by the original weight pockets.

This is the first of two articles and covers the first half of the work involved: removing the interior and exterior trim and the old window; salvaging the exterior rigid foam; reframing the opening with minimal disturbance to the interior plaster; flashing the rough opening.

The second article will cover the installation of the new flanged window: tying it into the existing air barrier; air-sealing and insulating; retrimming the window inside and out.

Both articles draw on a four-part video series at ProTradeCraft.com entitled “How to Install a New Flanged Window in an Old Wall.” The work was performed by David Joyce, who specializes in high-performance building and remodeling, and is a frequent contributor to ProTradeCraft.com.


how to replace a window
Removing the extension jambs reveals housewrap and sealing tape at the window frame, then 2 inches of rigid foam, followed by a layer of ¾-inch plywood, which was used to flush up with the 1x3 wood furring used to create a rainscreen and to provide solid fastening for the clapboard siding.

how to replace a window

how to install a window
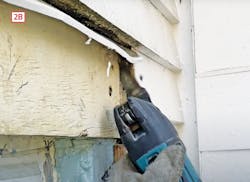
Joyce uses a circular saw to cut the plywood flush with the edge of the siding, setting the blade depth to minimize damage to the surface of the foam [2A]. He finishes the corners with a multi-tool [2B].


Removing the Old Window

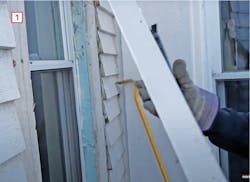
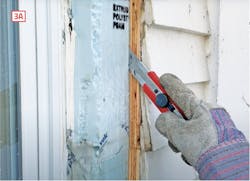
Joyce begins by removing the exterior trim and extension jambs, which slowly reveals the construction layers beneath [1]. To access the weight pockets, Joyce uses a circular saw to cut back the plywood to the edge of the siding [2], then uses a long-blade utility knife to cut back the foam [3].

The trick here is to avoid cutting the housewrap underneath the foam because he’ll need to tie back into it later. He also wants to save the foam pieces so he can put them back after the new window is installed.


steps to replace a window


how to replace a window


how to replace a window
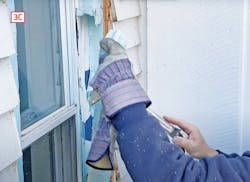
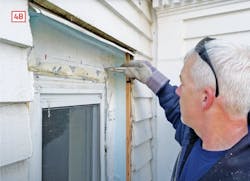
To cut and salvage the foam without nicking the housewrap, he uses a long-blade utility knife with the blade set about ½-inch short of the foam thickness [3A]. After scoring the foam, he inserts a flat bar and pries sideways to pop the foam off the wall [3B]. The last ½-inch will not always break cleanly [3C], but the edges will mate up perfectly when the foam is replaced. 

With the foam cut back, the original window jamb is exposed. The housewrap had been taped to the jamb, but that seam now needs to be cut back to remove the jamb [4]. As long as there’s an inch or so of housewrap sticking out past the foam, Joyce can use tape later to seal it to the frame of the new window.

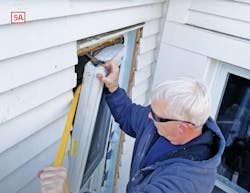
After removing the screws holding the replacement window in place, Joyce pries it out of the opening [5], then moves inside to remove the interior trim, which will give him access to the original jamb and sill.


how to install a window


how to replace a window
The final step before removing the old window is to cut the housewrap where it has been taped to the window frame [4A]. The goal is to leave at least a 1-inch strip of housewrap intact beyond the edge of the foam [4B], which will later be sealed to the frame of the new window.

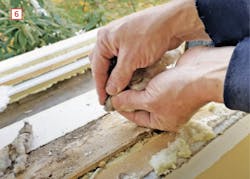
In the process, he squeezes out a thimbleful of water trapped in the fiberglass chinking that had been stuffed between the original sill and the sill of the replacement window [6]. The window itself had been leaking, possibly for years, but there’s no water damage to the opening, evidence that the sloped sill does channel excess water out and away.

After removing the old frame and sill, pulling fiberglass insulation out of the weight pockets, and scraping away the old canned spray foam, the old opening is ready for a new frame. 


replacing an old window
After prying out the old window [5A], Joyce moves inside to remove the interior trim. 

how to replace a window

how to remove a window
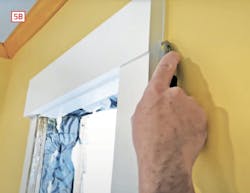
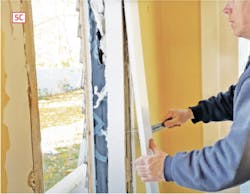
Even though the new trim will overlap the paint line, he minimizes the need for touchup by scoring the outside edge to avoid tearing the paint [5B], then pries off the casings and extension jambs [5C].


how to remove a window
The fiberglass chinking stuffed between the original sill and the sill of the tilt-in replacement window held about a thimbleful of water. Despite this evidence that water had been getting in (possibly through the window itself), there was no damage to the wood opening, likely due to the sloped sill providing a path for water to drain down and out.

Framing the R.O.

Windows are usually installed by two people, one inside and one outside, but Joyce will be installing the window alone, working from the outside. To make sure the new rough opening is centered on the old one, he makes a center mark on the outside of the new window, then measures the old opening and makes a center mark on the housewrap at the header.

After doing the math―“Since the window is 21¼ inches, I want my rough opening to be 22¼ inches, so I measure 11⅛ inches to either side and make a mark”―he pads out the jambs of the new rough opening.

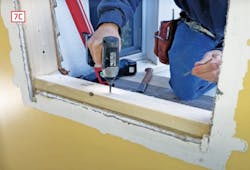
Joyce also wants the window to match its original location vertically, so he does the math, which is a little trickier [7], then pads out the header and the sill. The old rough sill is sloped already so the new sill will be sloped as well.


window replacement how tohow to install a window
how to install a window
To locate the new window vertically, Joyce leans inside, measures down from the paint line the width of the trim, and makes a mark, then adjusts for any reveal where the casing will meet the extension jamb and makes a second mark [7A], which locates the top of the new window. Adding ½ inch to the height of the new window, he then measures down and marks a line where the sill should finish out [7B]. He pads out the header and the sill, which follows the slope of the existing rough sill [7C]. 

Flashing the Opening

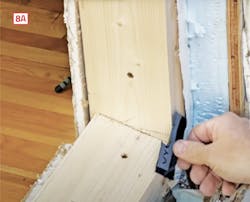
Now the new opening is ready for what Joyce calls “sub-flashing”―a layer of flashing membrane that covers the framing before the window is set. Joyce starts at the bottom corners of the sill [8], which are the weakest spots in a window opening because water can collect there if it finds its way in.

Joyce also flashes the sill, which, in this case, is sloped, so it’s much less vulnerable, but flashing here gives double protection to the corners. The jambs are also flashed to protect the framing, but it’s not meant to integrate with the water-resistive barrier; that will be tied in after the window is in the opening.


how to install a windowhow to install a window
how to install a window
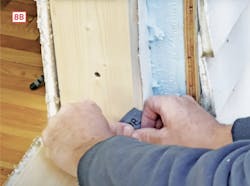
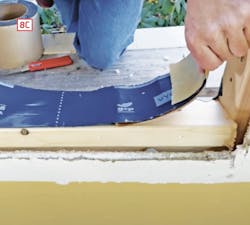
Using peel-and-stick flashing at sill corners is easier with stretch flashing, but Joyce’s method also works when that material is not available. It starts with a small piece applied to the face of the sill and jamb and slit diagonally [8A]. Each side of the cut is then stretched as much as possible and pressed into place against the framing [8B]. Split-paper sill flashing is then applied to the sill [8C] and runs a few inches up the jambs. 

how to replace a window

how to replace a window
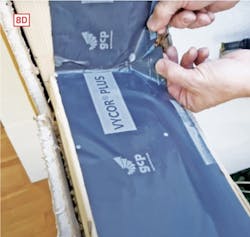
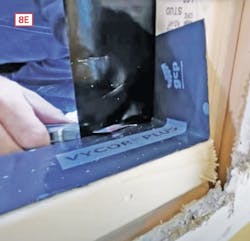
After slitting it diagonally just shy of the corners, each side of the cut is stretched as much as possible before pressing it into place over the corner tape [8D]. Vertical flashing is slit at the sill and wrapped onto the jambs [8E].


Next time, we’ll look at the steps involved in reintegrating the new window into the existing water-resistive and air barriers, restoring the insulation, and retrimming inside and out.


written by

Sal Alfano

Executive Editor

Sal Alfano is executive editor for Professional Remodelersal.alfano@gmail.com, 202.365.9070


Add new comment

Plain text

  • No HTML tags allowed.
  • Web page addresses and email addresses turn into links automatically.
  • Lines and paragraphs break automatically.
leaderboard2 - default

Related Stories

How to Retrofit Foundation Footings

To make a low-height basement a more comfortable living space, this remodeler digs deeper but needs to add support to do so

6 Must-Knows for Installing Pocket Doors

Save your sanity: Do it right the first time

Crawl Spaces to Basements: Proceed with Caution

Converting a crawl space to other uses can upgrade a home and add significant value, but when done incorrectly, it can also be disastrous 

You Need to Talk About It: Mental Health in Construction

Men in the construction industry die by suicide at a rate nearly four times the national average. What should business leaders do about it?

How to Attach a Patio Roof to an Existing House

A graceful integration may mean more work but improved functionality and aesthetics 

How To Improve Energy Performance in Existing Attics

There’s more to insulating the attic than attic insulation; there’s venting, air sealing, and misery

How to Install PVC Bevel Siding Over Rainscreen

It’s a lot like installing wood bevel siding, except it won’t warp or rot. And it expands and contracts differently and for different reasons

Understanding How PVC Trim Moves

Anybody who’s used PVC in an exterior application knows that it moves seasonally. Just like wood, right? Not exactly

To Vent or Not to Vent: A Discussion

In an attempt to strike a middle ground between high-performance and attainable, these three remodelers engage in a candid conversation

Ceiling Insulation and Installation at Model ReModel

Watch the building process of this accessory dwelling unit's vaulted ceiling 

Advertisement
boombox2 -
Advertisement
halfpage2 -
Advertisement
native1 -

More in Category


Advertisement
native2 -
Advertisement
halfpage1 -
Advertisement
leaderboard1 -