Two Head Flashing End Details
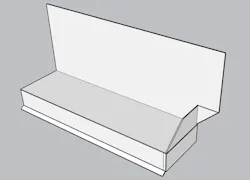
If you haven’t heard of International Flashing Awareness Day (IFAD), you are not alone. If you don’t know about head flashings with end dams, you are also not alone. But not for long.
Head flashing sits atop the window casing to protect the casing and window from letting in sideways rain and to shed water that does manage to get behind the siding out and away from the house. And like other water protection topics, the action isn't in the middle of the flashing, where continuous coil stock is a solid barrier. Water leaks happen at the edges and/or overlaps.
Head flashing that ends at the edge of the window casing creates a vulnerable spot where water will actually wrap under the flashing—due to surface tension—effectively pouring behind the siding at the window edge.
Head flashing method 1: Fold the ends down
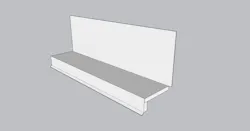
One option is to fold down the ends, so that water flows down the side and the front.
To make the fold-down end, cut the flashing about ½ inch longer than the window casing length.
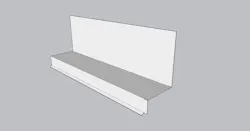
Snip ¼ inch at the two bends. Fold the vertical leg back along the side and then fold the horizontal leg down over the vertical one.
This method is quick and simple, and much better than nothing at all.
Head flashing method 2: Fold the ends up
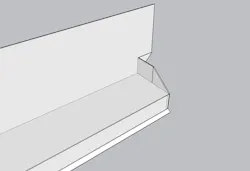
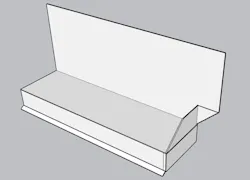
A higher-performance option creates an end dam at each end of the flashing so any water collected by it MUST be directed out at the face. None of it is allowed to flow down the side of the window casing. In honor of International Flashing Awareness Day, remodeler Aron Jones, of Big Dog Construction in Grand Manan, New Brunswick, illustrated his end dam head flashing detail in a video on the IFAD YouTube channel.
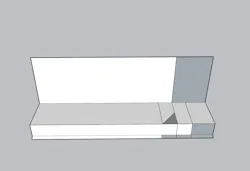
Aron draws three lines on the brick mold head flashing he is using: at 3-1/2 inches, 2-1/2 inches, and 1-1/2 inches from the end of the flashing. He uses a small template piece to keep the angle straight and mark where it goes. You could use 45 degrees, but Aron likes to match the angle of the kicked-out drip edge at the bottom, which is around 22 degrees.
After drawing the lines, he marks which pieces to cut away and starts cutting them away. To cut out the angle piece, he bends one tab up and another back under the horizontal.
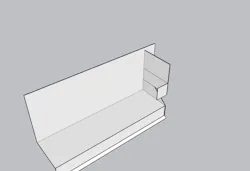
The first bend is up. Because he didn’t snip the inside bend, it folds the vertical leg back on itself, creating a sealed corner that requires no sealant. He uses hand seamers or bending pliers to tighten the folds.
Crimping with seamers or pliers will flatten the formerly bent tab back into the plane from whence it came. Crimping also gives the flashing a much cleaner look.
“This is going to be seen,” says Aron, reminding us that it is finish work.
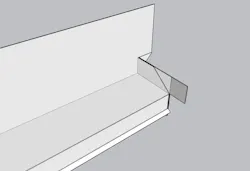
The second bend is back down, at the top of the angle cut. That tab that has been getting bent in and back can now be trimmed.
“The more meat that you leave on here, the easier it is to fold...” back over the angle cut.
Bending the exposed edges helps prevent nasty cuts, and it is worth it.
About the Author
 Daniel Morrison
Daniel Morrison
Editorial Director
Daniel Morrison is the editorial director of ProTradeCraft, Professional Remodeler, and Construction Pro Academy.