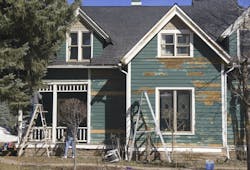
Wood has only a few enemies. An encounter with termites, fire, or a weekend warrior is almost always fatal. But when it comes to a fourth enemy, water, wood is amazingly resilient. Wood can get wet over and over and over. There’s just one catch: It must be given the chance to get dry.
German post-and-beam homes used straw infill as insulation and a lime-based plaster parging as the cladding and air seal. The assembly could hold moisture without causing it to condense, and the plaster could dry very quickly. Water in the walls was rarely an issue. There were no building scientists or ventilation standards, and yet the buildings performed incredibly well and lasted for hundreds of years.
How to Insulate an Old House
The crime scene. Homes built before the 1950s worked in much the same way. The walls were wrapped with overlapping layers of paper with little or no flashing at openings or horizontal exterior trim elements. That allowed the sheathing and wall cavities to get wet fairly often, but heating the homes would dry out the wood. Though this was inefficient in terms of energy use, it wasn’t lethal to wood walls.
The motive. Since the 1950s or thereabouts, this simple wood wall has gained another enemy: the quest for energy efficiency. Not only did we add insulation, we often did it in the worst possible way: by drilling holes from the outside, blowing in cellulose, plugging the holes, and painting over it all. As it turns out, this is the worst thing you can do to an old house.
The murder weapon. Insulation placed between the studs of pre-World War II homes is the single most dangerous element in the wall assembly. This may not be what the energy-efficiency community wants to hear, but physics is physics. Uninsulated, unsealed walls dry out because they “breathe.” But adding insulation—and doing nothing else to manage bulk water, vapor, or ventilation—destroys this cycle.
The M.O. Adding batt insulation is bad enough, but if you really want to kill a house fast, drill some holes through the cladding, the drainage plane, and the sheathing to completely destroy the wall’s first line of defense and pave a path for bulk water to enter the wall cavity. Then fill the cavity with an absorbent material like cellulose, which holds moisture, so that any leaks will go undetected and the wall will stay wet for longer. Now sit back and wait. In no time—sooner in a stucco wall, which depends entirely on the integrity of the drainage layer through which the holes for the insulation were drilled—you will find moisture levels exponentially rising in the wall cavities.
And if you really want to maximize the damage, install a set-back thermostat that drops the temperature to 65ºF at night. You’ll be sure to get some good capillary condensation action on the sheathing, framing, and insulation that will further help speed the process.
The solution. These days we don’t want any part of a home’s enclosure to breathe. The only breathing a home should do is through open windows or mechanical ventilation. The rest of the house should be sealed up tighter than a mausoleum.
To insulate older homes, you must remove the cladding and weather barrier, drill the sheathing and blow or inject loose fill or foam insulation, replace the windows, install flashing properly integrated with the water resistive barrier, and replace the cladding, ideally adding a rainscreen. On the interior, you must air seal penetrations, replace window millwork, and repaint with vapor-retarding primer.
Adding Insulation to Walls
But wait, there’s more. This is hugely expensive in itself, but you must also perform a combustion spillage test, which will fail and require replacing the furnace/boiler/water heater. Plus, your not-so-leaky house will not meet ventilation requirements, so you must add a heat-recovery ventilator/energy-recovery ventilator, or watch the house rot from the inside.
The Upshot
In other words, done right, insulating the walls of an old house is a serious undertaking that’s really an all-or-nothing proposition. Unless cost is no object, the next-best solution is to do nothing to the existing walls, and instead work from inside to air seal and insulate the lid, the rim joist, and the basement (See “Tips for Insulating Older Homes” for details). If you can air seal other stuff, great, but do not insulate the walls!
About the Author

Michael Anschel
Michael Anschel is president of Otogawa-Anschel Design + Build, in Minneapolis, and a founding board member of Minnesota Greenstar.
