


Often when people find out that I am a remodeler, they feel obligated to share personal stories with me about their experiences of remodeling.
(Part 2 is now posted. You can read it here.)
Many of the times, reading between the lines of the stories I hear a common theme: missed expectations. The price they agreed to changed, there were surprises that increased the cost or delayed the project, or there was little or no communication once the project started.
Most of these are preventable. This month and next, I’ll offer 10 tips that should help manage budget and prevent budget creep, minimize surprises once the project starts and establish a great relationship and expectations between the designer, remodeler and homeowner.
1. Assisting your client to choose a remodeler that is right for them
The value of references is not if you have them, it is what they say and the questions your prospective client asks them.
Make sure your client is asking tough questions of your competitor’s references: Would they hire them again? Why or why not? What is it that you liked? What is it that you didn’t like about the process? What was the communication like?
Ask for certificates of license or insurance to be sure they have not lapsed. Check BBB ratings. And one that often doesn’t happen: Have them check their credit rating. Your clients’ house may be the largest asset they own. They want someone that is financially secure; that can finish the project and provide them with a warranty.
2. Questions to be asking during the design phase
Scope: What are the details? If you are designing an addition, how is the heating and cooling provided to the new space? Is a qualified HVAC company planning the system? What are the details of the windows? How do they differ from the existing house windows? What are the exterior fascia, soffit and trim details; will they match the existing house? Are the electrical or plumbing systems sufficient? Most of these types of issues can be discovered during a trade walk through. (Visit HousingZone.com for my previous column on trade walkthroughs.)
Exclusions: What details are still remaining either “by others” or by allowance? One way to prevent budget creep is to minimize the allowances and exclusions.
A great quote from one of my clients was “I want to work with a designer that will ask me questions that I don’t know to ask.” Help your client uncover the details of the project by asking them questions they don’t know to ask of others.
3. Minimize surprises before and during construction
The due diligence step. The first step in any design process is to uncover what the restrictions are.
Explore the local homeowner’s association documents and how long the approval process takes. Identify what the set-backs are for the local zoning ordinances and find out if there are any other restrictions such as a historic district, or the property is located in a resource-protected area.
Are there any other code requirements? An egress window in a finished basement, GFI’s in the kitchen or bath, updating smoke detectors or arc fault outlets in any bedrooms?
If you are adding body sprays or multiple heads in the shower, are they on a well? Do they have enough water pressure and recovery? If you are adding a large soaking tub, will the hot water heater provide enough?
4. What are we agreeing to do?
This would consist of a scope of work, drawings, allowances, outstanding items and all the selections with product or manufacturer information.
Many times I will hear that someone has a “quote” for their project, although when you inquire about the details, they might not know what kind of windows they are using or how they are going to heat and cool the space. They have made assumptions and that is often where the problem lies.
5. Managing Expectations
Have a pre-construction walkthrough prior to anyone starting to work on the job. All clients have different expectations; you want to uncover any you can and set expectations of the process. Identify where and what the dust protection and floor protections are. If you are opening up walls to the exterior, discuss the process for keeping the elements out. Discuss any children or pets and their needs. Also find out if there any “off limits” area of the house.
Part 2 — with tips No. 6-10 — will appear in the May issue of Professional Remodeler.
Setting expectations and creating a great remodeling relationship
Add new comment
Related Stories

How to Insulate a Heated, Structural Slab with XPS
ProTradeCraft's Building Resilience season three starts with making a basement more comfortable

How to Retrofit Foundation Footings
To make a low-height basement a more comfortable living space, this remodeler digs deeper but needs to add support to do so


Crawl Spaces to Basements: Proceed with Caution
Converting a crawl space to other uses can upgrade a home and add significant value, but when done incorrectly, it can also be disastrous

Webinar: Project and Trade Management Musts—The New American Remodel 2023
Access the webinar here to learn project and trade management lessons from The New American Remodel 2023

How to Attach a Patio Roof to an Existing House
A graceful integration may mean more work but improved functionality and aesthetics
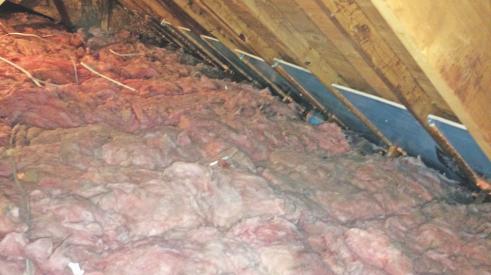
How To Improve Energy Performance in Existing Attics
There’s more to insulating the attic than attic insulation; there’s venting, air sealing, and misery

Model ReModel 2022: A Case Study in Sustainable, Thoughtful Construction
The eighth annual Model ReModel project features an accessory dwelling unit, designed for aging in place, attached to a 19th-century Victorian
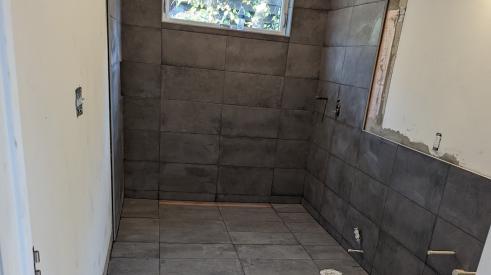
Installing a Curbless Shower
Model ReModel 2022 features an ADA-compliant bathroom. The contractor shares the install process
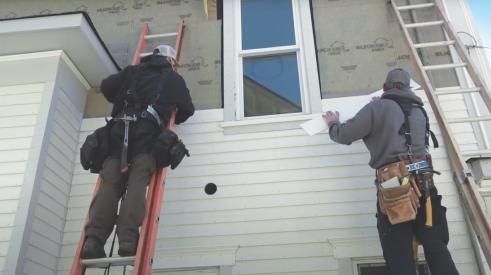
How to Install PVC Bevel Siding Over Rainscreen
It’s a lot like installing wood bevel siding, except it won’t warp or rot. And it expands and contracts differently and for different reasons