I recently had an opportunity to watch Pat Martin of Country Floors in Plainfield, Vt., tool joints in the tile backsplash in my kitchen, during which he explained how he manages to get perfectly clean tooled joints every time. Martin uses 100% silicone caulk because it bonds well to almost any material, and because he can get the Laticrete brand he often uses in a wide variety of colors that come close to matching the grout color.
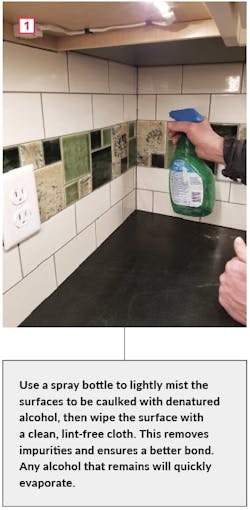
Tooling with a wet finger works with latex caulk, but it won’t work on silicone caulk, which is not water soluble. The secret to tooling silicone, which Martin learned almost 40 years ago from his father, Stanley, who founded the family tile and flooring business, is to wet the caulk with denatured alcohol before tooling. The technique works only with 100% silicone caulk, not latex or acrylic silicone, and not with isopropyl alcohol. Here’s a step-by-step look at the process.
Clean the Surfaces
The alcohol doesn’t damage most surfaces, but be careful against a painted wall. “It will thin out the paint and make it run a little bit,” Martin says. “But once it dries, the paint will harden back up. The trick is not to wet it too much to begin with.” For this reason, Martin sometimes switches to paintable latex silicone—where shower tile meets painted ceiling, for example—and skips the denatured alcohol. “The joint is usually high enough to avoid the wet area,” Martin says, “and painting the caulk will cover small smears.”
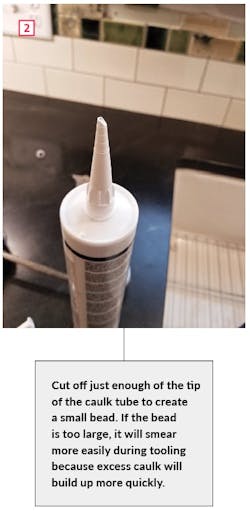
Cut the Tip, Not Too Much
When cutting the tip of the caulk tube, cut off just enough to make for a small bead [2]. “The first mistake most people make is to cut too much off the tip of the caulk tube,” Martin says. “That makes for a bigger bead, which will tend to smear more easily.” Martin prefers to use caulk tubes with removable tips, which he can transfer from tube to tube, making for a consistent bead.
The other key to bead size is to avoid leaving huge joints in the tile in the first place. Caulk expands a little as it comes out of the tube, but filling a big joint mayCaulk, Spray, Tool
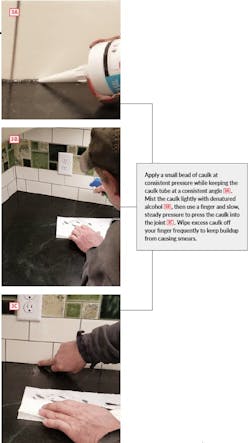
Begin applying a small bead of caulk at consistent pressure while keeping the caulk tube at a consistent angle [3]. Stopping and starting can cause excess caulk to build up, which will tend to smear during tooling. “I try to caulk as much of the joint as possible in a single pass,” Martin says. “But I try not to go too far because I don’t want the silicone skinning over before I can get it clean.”
After misting the caulk bead lightly with denatured alcohol, Martin starts at one end, using slow, steady pressure from his finger to press the caulk into the joint. As his finger moves along the bead, the alcohol acts as a solvent, creating a clean line on both surfaces. “I only go a few inches at a time, then wipe the excess caulk off my finger,” Martin says. “This keeps caulk from building up and creating a smear.” On this backsplash, Martin wiped off excess caulk once and sometimes twice between every joint in the 3x6-inch subway tile.
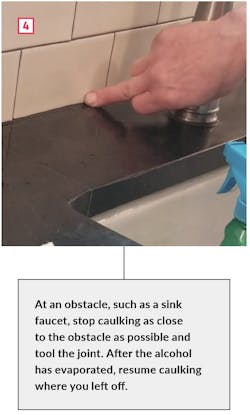
If you have to caulk around an obstacle, as was the case here at the sink faucet [4], stop caulking as close to the obstacle as you can and tool it,At corners where upper cabinets interfere with the angle of the caulk gun, draw a bead from the top to the middle, and finish by drawing the rest of the bead from the bottom up. Then immediately tool the whole joint.
Fixing Smears
Smears are inevitable, but the denatured alcohol gives you a fighting chance to remove them when they occur. The trick is to deal with them immediately. It doesn’t hurt to add more alcohol mist—it will help clean the smear but will evaporate rapidly enough that it doesn’t affect the curing of the tooled caulk in the joint.
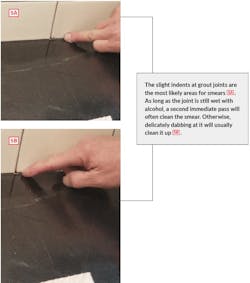
Excess caulk buildup can cause a smear anywhere along the joint, but the areas around grout joints are the most likely places to smear [5]. As long as the caulk is still wet with alcohol, simply making an immediate second pass along the joint with your finger will clean most of these smears. If that doesn’t do it, you may need to dab at the smear more deliberately, again making sure the caulk is wet with alcohol.About the Author
Sal Alfano
Executive Editor
Sal Alfano is executive editor for Professional Remodeler. [email protected], 202.365.9070
