

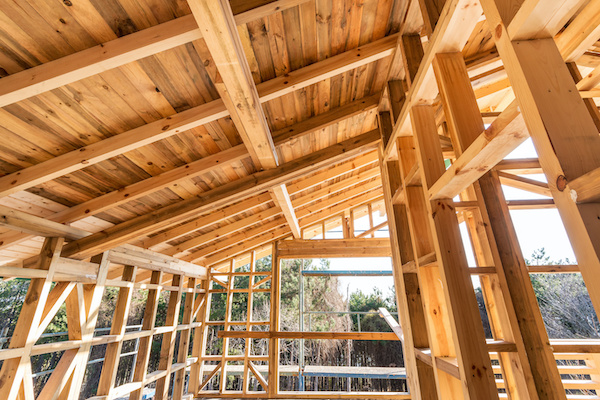
Over the past 25 years as a builder, building inspector and lumber industry representative, I've inspected a great deal of framing all over the country. While terminology and techniques vary from region to region, certain framing problems don't. Let's look at some common framing problems and how you can fix or avoid them.
Bracing narrow walls beside large openings
With the advent of the new international building codes come changes with which all of us have to deal. Among the key things are more stringent bracing requirements for walls.
Putting windows from corner to corner on an addition is not unusual. But you must remember to provide solid wall space on either side of these large areas of glass to provide lateral stability for the structure against wind and seismic forces.
The code says you should have a 4-foot-wide braced wall panel on each corner of the structure and every 25 feet down the length of the wall. It would be ideal if designers provided these panels at each corner in their plans, but it just does not happen. When additions are designed, the walls often are not wide enough to allow for 8 feet of solid braced panels as well as the windows the homeowner wants. You end up with narrow walls beside large expanses of glass.
Testing and experience have demonstrated that narrow wall panels do not provide the lateral resistance needed in many cases to resist the lateral loads imposed on a structure. The code has an alternate bracing provision that allows you to reduce those 4-foot braced wall panels to 32 inches if you do certain things with your nailing pattern and anchor these narrow wall sections in a prescribed manner.
However, there still are designs that place walls less than 32 inches wide beside large openings. Let's look at how to deal with walls that are only 24 inches wide or even 16 inches wide.
RELATED: Do Advanced Framing Techniques Benefit Remodelers?
Want more? Check out our story about advanced framing.
The first thing to understand is that lateral forces on a building create loads that cause the building to want to slide off its foundation. This sliding force, called base shear, is resisted by the anchor bolts. So if the building can't slide, the next thing lateral forces do is rack the walls. Proper bracing resists this racking process. If you make the walls stiff enough to reduce the racking potential, you end up with another problem called overturning. Studies have shown that narrow wall panels provide little racking resistance unless all the edges are nailed at a very close nailing schedule. Then you end up with very high overturning forces.
Holdown anchors resist overturning forces by attaching the framing to the foundation. But headers also can provide a great deal of resistance to these forces. When the header ends at the edge of the window or door opening in the case of garage doors, the overturning forces need only to bend the double top plate to rotate the narrow braced panel beside the opening. However, if the header is run all the way into each corner, with double king studs on each end and double trimmers on each side of the window or door opening, structural panels running plate to plate on these narrow walls can tie the wall and header together as one. Now the overturning forces in the narrow wall panel must bend the header for the panel to rotate and overturn. This is not likely given the depth of the header. In high-seismic and high-wind areas, holdowns on both ends of each panel are still necessary. In other areas, a single holdown on each end of the wall line should be sufficient.
If you find yourself dealing with walls less than 16 inches wide, consult an engineer to determine the bracing and holdown requirements for your situation to avoid framing problems.
For those faced with walls only 16 to 24 inches wide on either side of large windows or doors, remember to do the following and you will have a wall that can work and still meet the intent of the code:
1) Place the header where the load is, under the double top plate. Fill in below the header to the top of the opening if necessary.
2) Run the header all the way into the corner with double king studs on each end and double trimmers on each side of the window or door opening.
3) Apply a minimum of a 3/8-inch structural panel continuously from the bottom plate to the top plate and nail the edges to both double king studs and both double trimmers at 3 inches on center. Nail the edges at the bottom and top plates at 3 inches on center also. Finally, nail the field of the header at 3 inches on center both horizontally and vertically.
4) Strap the header to the double trimmer on the inside wall to reduce potential hinge effect, especially in high-wind and high-seismic areas.
5) Use holdowns on both ends of each panel in high-wind and high-seismic areas; in other areas, one holdown on each end of the wall line should be sufficient. Remember that anchor bolts still are required in addition to the holdowns.
Improper nailing of joist hangers
Many builders and remodelers use joist hanger nails to support the hangers they use to carry joists or even beams. This seems logical because they are called joist hanger nails. The truth is, these nails are designed to hold the joist in the hanger, not to support the hanger. That's why they are only 1 1/2 inches long. You don't want them going through the joist and coming out the other side.
Two things affect the nail's ability to support the hanger: its shear strength and its withdrawal resistance. A joist hanger nail is a short 10d nail, so it has shear strength. On the other hand, being only 1 1/2 inches long, it does not have the withdrawal resistance that a 3-inch-long 10d common nail has. So single hangers need a minimum of 10d common nails into the header or beam supporting the hanger. Double hangers should be supported by a minimum of 16d common nails. For remodelers using 16d sinkers, they are equivalent to a 10d common nail. Therefore, they can be used to support single hangers but not double hangers.
Occasionally, joist hanger nails can be used to support hangers carrying lighter loads. A single joist hanger supported by joist hanger nails can carry only 77% of its intended capacity. When it comes to double hangers, you are down to just 64% of the hanger's capacity if you use joist hanger nails to support the hanger.
Some hangers have the required supporting nail size stamped on the hanger. Look for it. But if you don't find the size on the hanger, remember that 10d common nails support single hangers, and 16d common nails support double hangers. Joist hanger nails hold the joist in the hanger. Check with the manufacturer for specific information about various hanger installation requirements.
Also watch the type of face-mounted hangers you get from your supplier. Many of what we call double shear hangers are sold. These hangers can be distinguished from regular face-mounted hangers by the dome or tab sticking out from the side of the hanger. Double shear hangers require face-nailing into the supporting member as well as toe-nailing through these domes or tabs. The toe nails are installed into the joist and header, distributing the load through two points on each nail for greater strength, thus the term double shear. Obviously, joist hanger nails cannot be used in these type hangers. Common nails must be used to support double shear hangers.
When it comes to supporting wood I-joists, the hanger must support the bottom and top flanges. If the hanger is not long enough to support at least 3/8 inch of the top flange, then a web stiffener is required. For face-mounted hangers up to 2 inches wide, 10d common nails usually are required to support the hanger. Hangers more than 2 inches wide usually require 16d common nails to support the hangers. Top-mounted hangers usually require 10d common nails to support the hanger. Always check with the hanger manufacturer for proper nailing applications depending on the style of hanger.
Want more? Check out why this pro prefers FastenMaster LOK structural wood screws.
Cantilevered joists
When it comes to cantilevers, I'm sure everyone has heard the rule of thumb "one out to two in." This applies to cantilevers in nonbearing applications only. For example, you could have a bay window sitting on the end of a 2-foot cantilever, and this would be considered nonbearing because typically a header is back at the main wall line to support any loads from above. Therefore, you could cantilever out 2 feet for the bay window, and as long as you come back in 4 feet, the rule of thumb applies.
So how far can you cantilever joists and put a bearing wall on the end of the cantilever without engineering the joists? Loads transfer at a 45-degree angle through whatever is supporting them. Therefore, if 2x10 joists, which are actually 9 1/4 inches deep, support a bearing wall 9 1/4 inches from the support underneath, the loads will transfer at a 45-degree angle back to that support, and no engineering is required. So the answer is the depth of the joist from the support. Cantilevers beyond this distance need to be engineered.
You also should remember that 2x10 floor joists that are No. 2 grade Douglas fir or southern pine can cantilever 2 feet supporting a roof load only, and they will work. The same is true for wood I-joists. They also can cantilever 2 feet as long as they are supporting a roof load only.
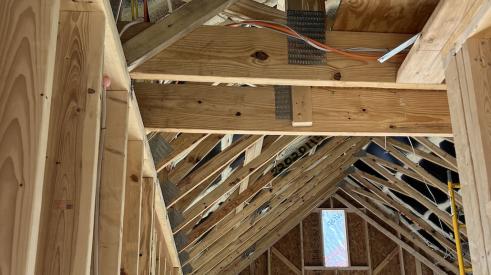
Toe-bearing rafters
One of the last things done on an addition is framing the roof. To tie a new roof into an existing roofline, rafters often bear on the toe rather than the heel of the seat cut or are notched too deeply over the top plate. These situations weaken the rafter at the bearing point and can split the rafter. Always try to bear the rafter on the heel of the seat cut. This does two things. It means the full depth of the rafter is bearing on the top plate, so you don't have to worry about the rafter's splitting. It also means you can get more insulation over the top of the outside wall, providing much better energy efficiency.
In some cases, providing full bearing at the heel cut might require lowering the exterior wall a few inches. The height of the wall can be determined from the plans and double-checked in the field. However, instead of lowering the wall, the rafters frequently are notched. If rafters are notched too deeply over the top plate (kind of a reverse bird's-mouth), they could split at the inside edge of the top plate because of shear stresses caused by the flexing of the rafters under load. Joist hangers can be used in this case to support the heel of the rafters, eliminating the problem. Simply attach the hanger to the double top plate and set the heel of the rafter in the hanger. Remember, top flange hangers are made that also work well in these cases.
Supporting hip and valley rafters
Think of hip and valley rafters as beams that hold up the roof. Beams, of course, must be supported at both ends. Therefore, hips and valleys must be supported by the exterior wall (the bottom end) and at the ridge (the top end). "At the ridge," not "by the ridge." There is a big difference. Depending on the length of the hip or valley rafter, you also might need intermediate support.
First, be sure you have good bearing for your hip and valley rafters on the top plate of the outside wall. These rafters must sit directly on the wall for bearing purposes. Be sure there are studs directly beneath them. Unfortunately, valley rafters sometimes end up being toe-nailed to another rafter near the outside wall but not extended far enough to bear on that wall. This means just a few nails must support the entire load imposed on the valley rafter. Nails alone are not supposed to carry loads. Framing members should support other framing members, i.e., rafter to studs, studs to joists, joists to the foundation.
The bottom end of both hip and valley rafters must sit on the exterior wall, and the seat cut should bear as close to the heel as possible. This is hard to do with hips and valleys, so sometimes you need to double or even triple these members to provide more bearing area at the supporting wall.
If you use engineered wood products for hip and valley rafters, remember that they are not to be taper-cut or notched on the tension side of the member. They must bear fully on the heel cut or be checked for shear by an engineer.
At the top, which is at the ridgeline, the ends of hip and valley rafters must be supported by legs down to a bearing wall or beam. The end of the ridge also might need to be supported depending on the roof design. If these legs are 8 feet or longer, they need to be T-shaped so they don't buckle under load. These legs are extremely critical when the main roof frames down onto a smaller dormer. It's always better if you can frame the dormer over the main roof. This, of course, requires a header to support the main roof framing.
Finally, if the hip or valley rafter is very long, it might require intermediate support. Be sure this support is placed above the midpoint of the rafter span. Placing it too low can cause the heel of the hip or valley rafter to raise off the wall plate under loading conditions.
Do you do bathroom remodels? Check out this project that went from framing to building a luxury shower in one day.
Taper-cutting beams
You need to watch the taper-cutting of beams or joists closely. Usually this becomes a problem for ceiling joists under low-slope roofs or when you use a beam as an upset header. You might not have enough height above the plate line at the perimeter of the building to allow for proper depth at the bearing point. You do not want to see the beam or joist cut to a point where it bears on the top plate. Doing this means you don't have enough cross-section at the end of that beam to support the load it's required to carry.
If the cross-section at the end of a beam is too small, shear can become a problem. This would require getting the beam engineered. To increase the depth at the bearing point, you might want to set the beam down into a beam pocket. The length of the taper cut can be up to three times the depth of the member, so the length of the taper cut usually isn't a problem.
David A. Utterback owns TimberTek Consulting, in Overland Park, Kan. The firm specializes in building codes and inspections along with educational seminars on wood frame construction and the building code.
Quality construction requires addressing these trouble spots
Add new comment
Related Stories

How to Retrofit Foundation Footings
To make a low-height basement a more comfortable living space, this remodeler digs deeper but needs to add support to do so


Crawl Spaces to Basements: Proceed with Caution
Converting a crawl space to other uses can upgrade a home and add significant value, but when done incorrectly, it can also be disastrous

You Need to Talk About It: Mental Health in Construction
Men in the construction industry die by suicide at a rate nearly four times the national average. What should business leaders do about it?

How to Attach a Patio Roof to an Existing House
A graceful integration may mean more work but improved functionality and aesthetics
How To Improve Energy Performance in Existing Attics
There’s more to insulating the attic than attic insulation; there’s venting, air sealing, and misery
How to Install PVC Bevel Siding Over Rainscreen
It’s a lot like installing wood bevel siding, except it won’t warp or rot. And it expands and contracts differently and for different reasons
Understanding How PVC Trim Moves
Anybody who’s used PVC in an exterior application knows that it moves seasonally. Just like wood, right? Not exactly
To Vent or Not to Vent: A Discussion
In an attempt to strike a middle ground between high-performance and attainable, these three remodelers engage in a candid conversation
Ceiling Insulation and Installation at Model ReModel
Watch the building process of this accessory dwelling unit's vaulted ceiling