

Any responsible bathroom remodeler puts an exhaust fan in the bathroom. The fan is usually located in the ceiling framing over the tub and shower, where most of the moisture is, and is vented out through a sidewall. When that’s not possible, a common workaround is to build a dropped soffit to house the fan and ductwork. Once the drywall is up, the soffit is out of sight and out of mind, but it still functions as an airflow network that connects the living space to wall cavities, the attic and basement, and the outside.
A better way to do it is to install the soffit after the room has been drywalled and air sealed. This makes it easier to isolate the soffit from the rest of the building and to ensure that the fan pulls air only from the room it’s in.
In fact, the tub should be installed after drywall, too. If that’s not possible, then be sure to insulate and air seal the walls before installing the tub. Otherwise you’ll short-circuit the airflow and the fan will pull unconditioned air into the room through cracks and openings in the wall and floor behind and under the tub.
Wall Vent
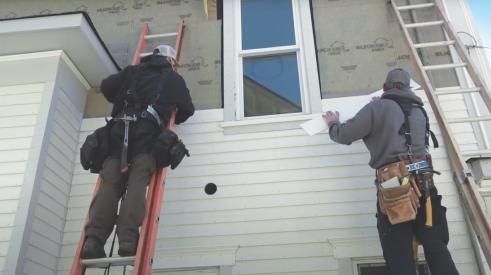
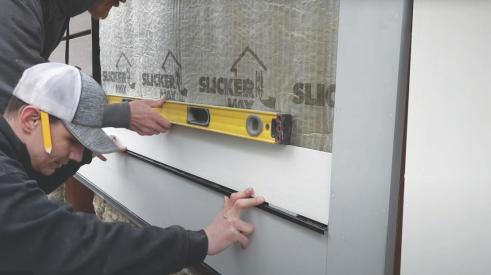
In an existing home, begin by installing an airtight wall vent. [1, see images below] This should be equal in diameter to the fan exhaust port or larger, and should include a backdraft damper and bug screen to prevent outside air and small critters from entering. Seal the flange to the housewrap with tape, carefully overlapping layers to promote drainage of any water that gets behind the siding.
Airtight Soffit
Unless you’re satisfied that the existing ceiling and walls are airtight, use caulk, spray foam, or tape to seal obvious cracks and create an airtight space above the soffit location. [2] If you have access to the attic, you can seal cracks from above.
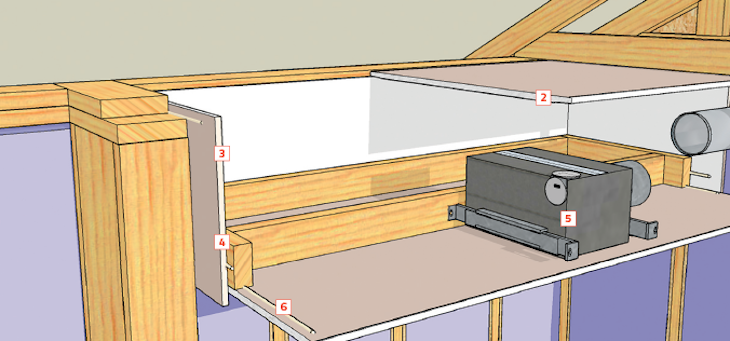
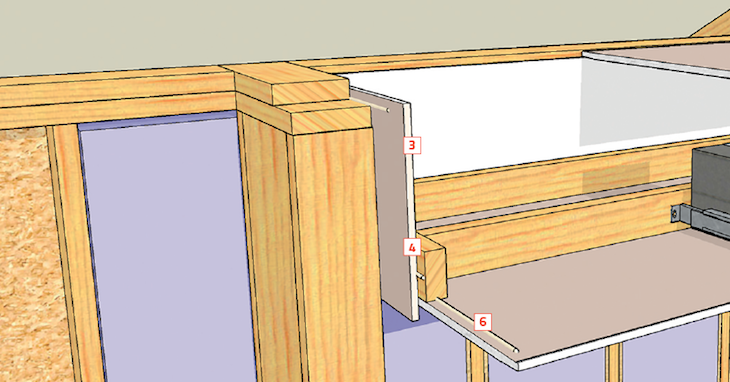
If you’ve demoed the walls and ceiling and want to frame the soffit before the drywallers arrive, caulk any seams in the framing, then glue drywall to the ceiling above the soffit and glue pieces of drywall to the studs at the perimeter. Butt these pieces against the ceiling and extend them far enough beyond the soffit dimensions (minimum 4 inches) so the drywallers can easily tape the seams later. [3] Seal all corners with caulk or spray foam. When you frame the soffit, run a bead of caulk behind the wall cleats to keep air from being drawn between the wood and the drywall. [4]
Before mounting the fan to the soffit frame, seal any openings in the housing. [5] Connect the fan to the wall vent with a short length of rigid or flex duct and seal the joints with metal tape or mastic.
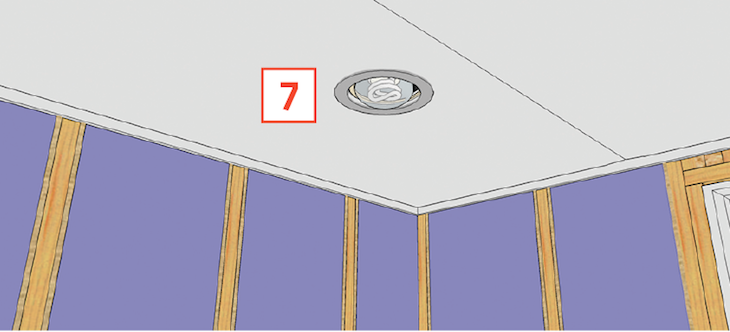
Apply a bead of caulk along the bottom edge of the soffit framing before adding drywall. [6] Use caulk or low-expansion foam to seal the lip of the fan intake to the drywall, then install a gasketed trim kit. [7] The drywall crew can take it from here.
Step-by-Step
1 ] Seal the wall vent’s flange to the water resistant barrier, making sure to properly lap the housewrap to promote drainage of water that may get behind the siding. Where the vent penetrates the interior wall, caulk the gap between it and the drywall.
2 ] Unless the existing ceiling and walls are airtight, seal any cracks with caulk, foam, or tape. If you have access to the attic, seal corners and seams from above.

3 ] For new construction or where existing plaster has been removed, glue pieces of drywall to the ceiling and walls, making sure to extend them beyond the edges of the soffit several inches so the butt seams can be taped later when the rest of the room is drywalled. Caulk or foam the corners to form an airtight enclosure.
4 ] Frame the soffit, adding a continuous bead of caulk behind the cleats to stop air from leaking by.
5 ] (see illustration, above) Use metal tape to seal any openings in the fan housing. Mount the housing to the soffit frame and connect it to the wall vent with a short length of flex duct. Seal the joints with metal tape or mastic.
6 ] Caulk along the bottom edge of the soffit framing before adding drywall.
7 ] Use caulk or low-expansion foam to seal the lip of the fan intake to the drywall. After the ceiling is painted, install a gasketed trim kit.
Thanks to David Joyce and Carl Seville for technical help on the original article, which has been adapted from ProTradeCraft.com.
Add new comment
Related Stories

How to Retrofit Foundation Footings
To make a low-height basement a more comfortable living space, this remodeler digs deeper but needs to add support to do so


Crawl Spaces to Basements: Proceed with Caution
Converting a crawl space to other uses can upgrade a home and add significant value, but when done incorrectly, it can also be disastrous

Webinar: Project and Trade Management Musts—The New American Remodel 2023
Access the webinar here to learn project and trade management lessons from The New American Remodel 2023

How to Attach a Patio Roof to an Existing House
A graceful integration may mean more work but improved functionality and aesthetics
How To Improve Energy Performance in Existing Attics
There’s more to insulating the attic than attic insulation; there’s venting, air sealing, and misery

Model ReModel 2022: A Case Study in Sustainable, Thoughtful Construction
The eighth annual Model ReModel project features an accessory dwelling unit, designed for aging in place, attached to a 19th-century Victorian
Installing a Curbless Shower
Model ReModel 2022 features an ADA-compliant bathroom. The contractor shares the install process
How to Install PVC Bevel Siding Over Rainscreen
It’s a lot like installing wood bevel siding, except it won’t warp or rot. And it expands and contracts differently and for different reasons
Understanding How PVC Trim Moves
Anybody who’s used PVC in an exterior application knows that it moves seasonally. Just like wood, right? Not exactly