

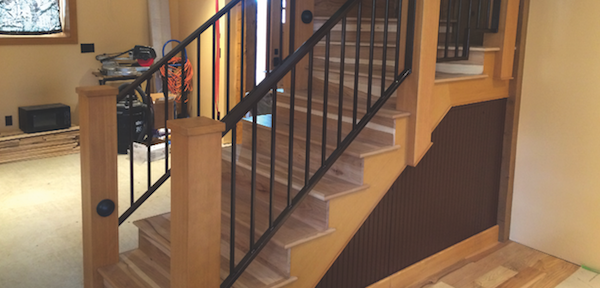
This remodel of a 100-year-old cabin built using vertical logs was started by the homeowner and his carpenter friend about four years ago. For a variety of reasons, it was never quite completed, and I was called in to finish the job.
In general, they did a great job preparing the project for the finish carpentry work. But when I take over someone else’s project, I look at more than just the existing carpentry. My three areas of concern are the money, the schedule, and the expectations.
There are two parts to the money issue. First, do the customers actually pay, and pay on time? Second, are they willing to spend what I think it’s going to take to complete the project? In this case, the answer to both questions was yes.
The schedule was important to the clients who, after working on the project for four years, wanted to see it come to an end. But they also understood that the finish work is not the place to hurry things along. So the schedule I laid out was fine with them.
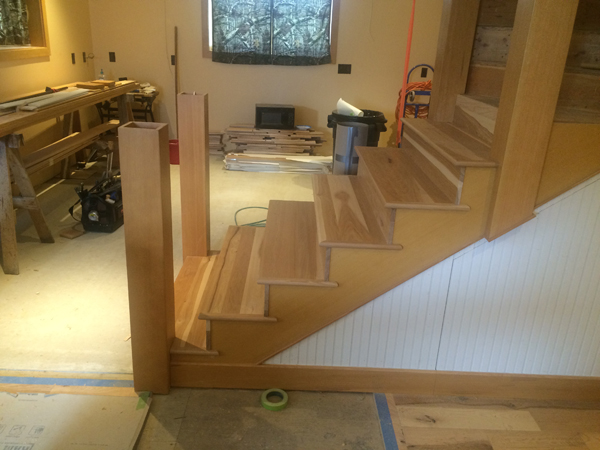
As to the quality of the work, their expectations were high, but not unrealistic. The scope of work included hanging three pocket doors, installing two entry doors, adding a top to a bay window seat, and routing out the flooring to install flush-mounted floor registers. But my primary job was to lay baseboard, trim out the windows and doors, and complete the stairs. I’ll focus on the stairs here, which involved fabricating and installing skirt boards, wrapping the newel posts, enclosing the landing with bead board, and fitting the factory-built stair treads, risers, nosings, and flooring to the existing rough stair. The railing would be metal, installed by others after my work was finished.
There were a couple of tricky parts to this stair trim-out. One involved the existing 4x4 post that rose up through the middle of the stair assembly, which had to be wrapped in place with mitered edges. The other was installing the nosings and flooring on the six triangular-shaped treads on the winder that connects the upper and lower straight flights.
This was mainly stain-grade work, so for the newel posts I decided to use vertical grain Douglas fir, which looks great, is easy to get here in the West, and is relatively affordable compared with other stain-grade species. The skirt boards would be ¾-inch vertical-grain fir plywood, and the treads and risers would be hickory to match the flooring. The walls of the landing would be covered with bead board, leaving a nearly invisible door into the crawlspace access underneath.
Building a Mitered Box Newel
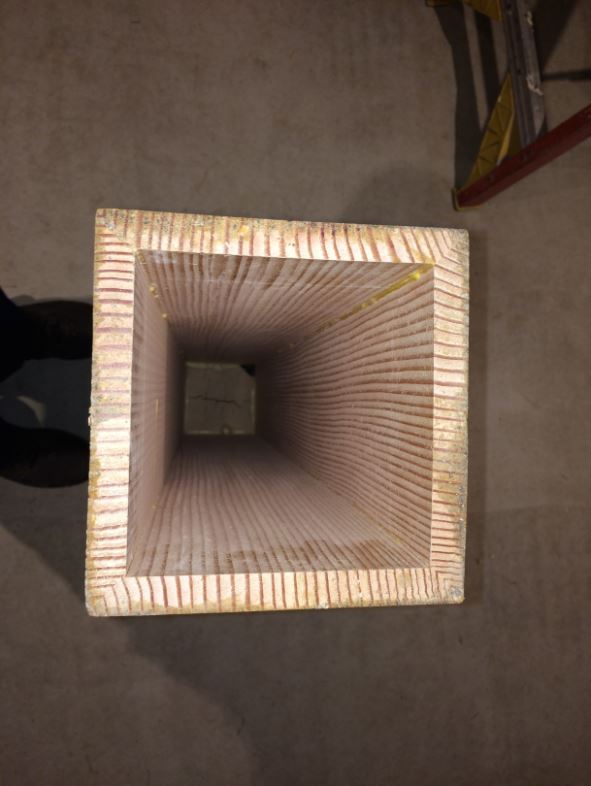
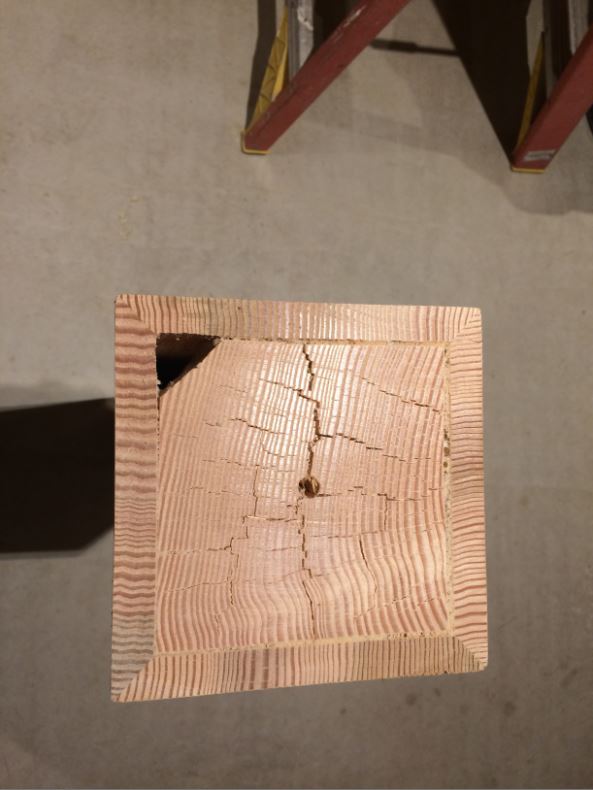
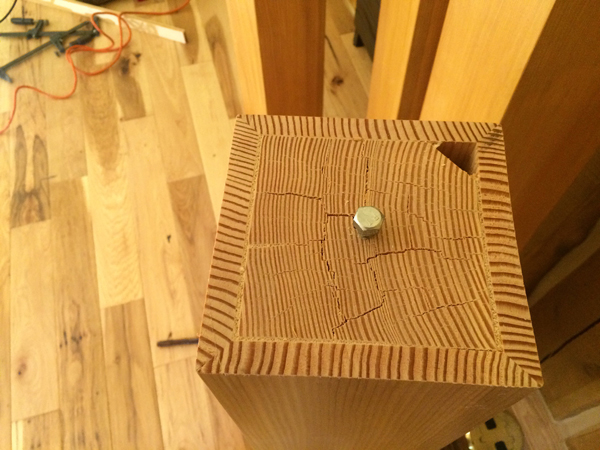
Other than the existing 4x4 center post, the newels for this stairway are 4-foot-tall, 6x6-inch vertical-grain Douglas fir boxes with mitered corners. The solid block in the bottom is for mounting the Keylock Newel Post Fastener hardware (more on that later) and for securing the newel posts to the treads and risers (1).
 1A
1A
 1B
1B
To build the box newels, I started with four 48-inch-long pieces of 1x8. I ran the pieces through a planer to take the cupping out, which reduced the thickness to 5/8 inch. To get rid of any crook or wain, I ran one edge over a jointer and used that edge against the table saw fence as I ripped the first 45-degree edge.
Next, I set the table saw fence so that I could rip the pieces to
6 1/8 inches wide between the long points. The extra 1/8 inch allowed me to run the long miters over my jointer and still finish with a 6-inch-square box. The jointed miters would ensure a tight glue joint.
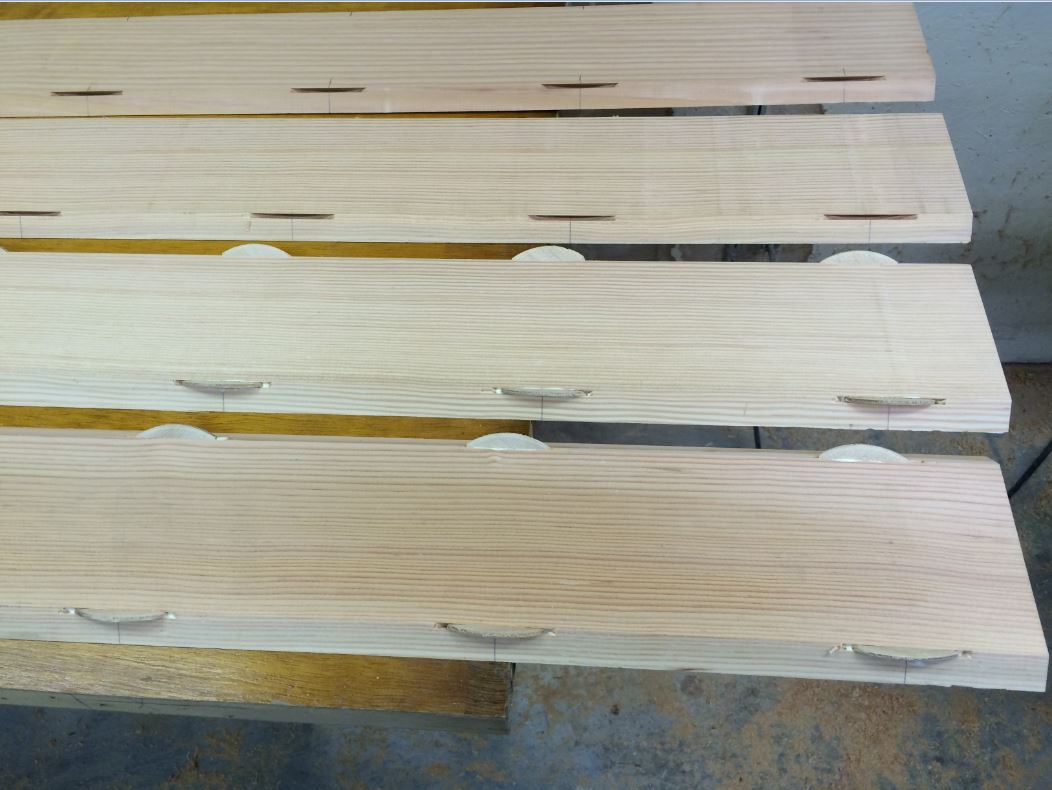
Once jointed, I cut biscuit slots along the edges near the heel, or short edge, of the miter, spacing them 6 inches on center, starting 3 inches from each end. Then I laid the four pieces side by side and applied glue to the biscuit slots and along the full length of the miters (2).
 2
2
Before this I had cut a piece of 6x6 into 1-foot lengths and ripped them to the inside dimension of the box newel. I ripped one of the corners of each block to create a chase for low-voltage wiring for lighting. Once the newel boxes were glued up, I slipped these blocks into the lower end of each newel, using polyurethane glue, which would expand to fill any gaps.
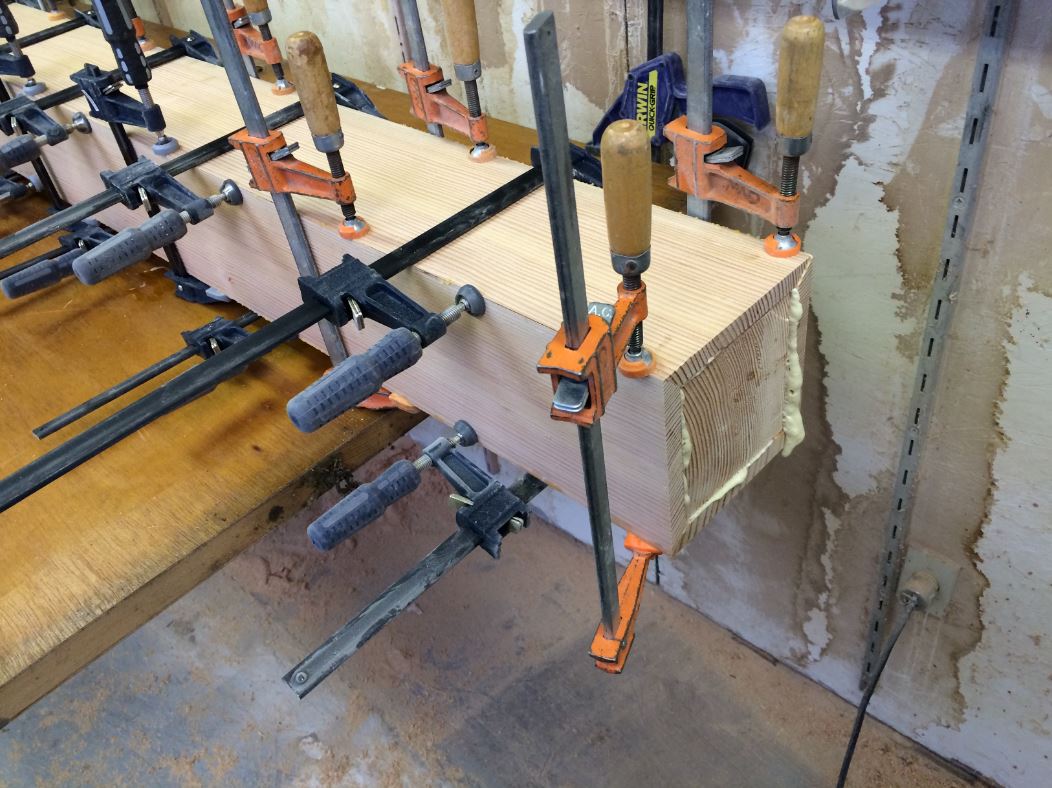
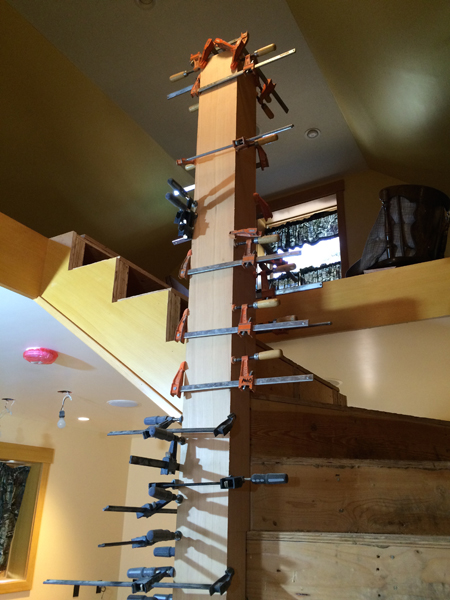
After installing biscuits in all of the slots in two of the boards, I began assembling the four pieces, making sure that I had plenty of bar clamps on hand. I applied just enough pressure to make the joints tight and the long points of the miters meet (3). I also pre-drilled a 5/16-inch hole in the center of each base block to accommodate the lag bolt from the Keylock hardware.
 3
3
Once the glue was dry, I removed the clamps, scraped off the excess glue, and sanded all four sides with 150 grit sandpaper on an orbital sander. To make sure that the corners would hold a finish, I eased the mitered corners with a 1/8-inch-radius router bit mounted in a laminate trimmer, then hand-sanded with a sanding sponge.
Prefinished Plywood Skirt Boards
Because these stairs are made up of multiple short runs, an 8-foot rip of prefinished fir plywood was long enough for each section of stair. The risers would not be mitered into the skirts, but instead would extend ¼ inch beyond the stringer, for a Craftsman look.
After ripping the fir plywood to a width slightly larger than needed and sending them to the painter to stain and seal, I used a protractor to determine the angle between the stair case and the floor and ceiling. The stairs were at about 30 degrees, so the cut for the bottom and top of the stringer skirt would be the complement, 60 degrees.
I cut the bottom of the skirt for the side with the access door and held it in position with a couple of 5d finish nails so that I could check the fit to the floor. The top of the skirt needed to miter into the horizontal skirt covering the stair landing. This joint was 30 degrees, so the miter angle was half that, 15 degrees.
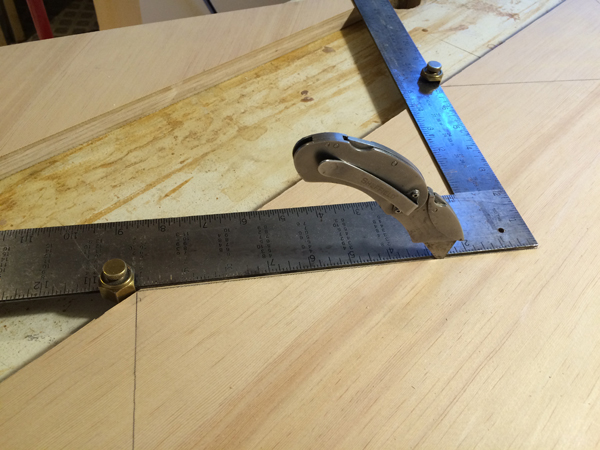
I used a compass that’s designed for scribing to scribe a line where each tread and riser would meet the skirt, making sure that my marks were at least 1/32 inch in front of the risers and above the treads to assure a tight fit. I removed the skirt and put it on a pair of sawhorses with the marked side up, then set stair gauges on a framing square to the rise and run of the stringers. After checking the straightness of the scribe marks, I used a utility knife to make new marks that were slightly more than flush with the rough treads and risers (4).
 4
4
I made the riser cuts using my glide saw, but the angle of the tread cuts was well beyond 45 degrees, so I cut them by hand using a 4½-inch trim saw and a homemade saw guide. Where the two cuts met, I used a small pull saw and a rasp to clean the corner. When all the cuts were made, I reattached the skirt using the original nail holes so it was back in exactly the same position as when I scribed it (5).
 5
5
I repeated this process for all of the skirting on the stringers. Where two pieces of skirting met at a miter, I used biscuits to align and strengthen the joint. The skirting around the stairwell opening was much simpler to cut and install because it was all the same width and the cuts were all 90 degrees (6). I back-beveled the ends about 5 degrees and cut each piece a little long so that the butt joints were very tight.
 6
6
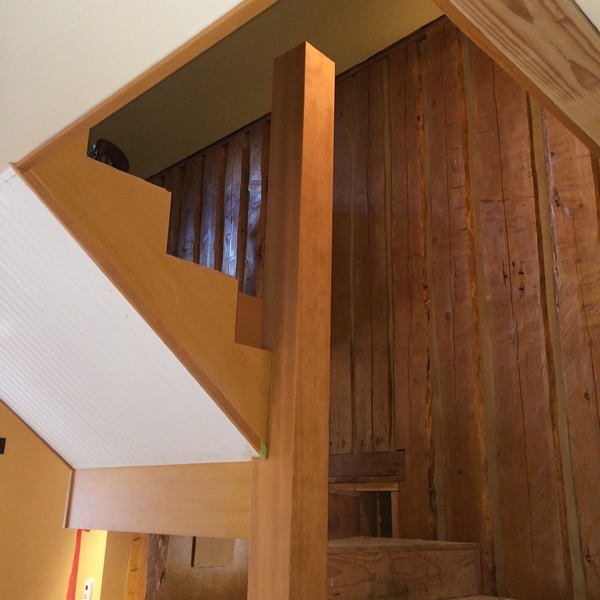
Wrapping a Tall Post in Place
The only post that could not be prebuilt on this stairway was the center one, which is part of the stair framing. That meant wrapping it in place with individual pieces of mitered fir and scribing around the treads and risers in a few places.
But alignment was the first issue. When I initially looked at this staircase, I noticed that the marks made by the original carpenter to locate the two starting newels were not symmetrical—the right one was correct, but the left one was about an inch too far to the left. The carpenter who had framed and set stringers had aligned the lower left newel marks on the 4x4 that ran from the floor up through the winders and served as the lower newel on the upper flight. But that 4x4 was offset about an inch.
Because the central post was going to be wrapped with 1-by boards to match the 6-inch-square newels, I decided to offset that wrapping toward the stairs as far as it would go. This made the lower newels symmetrical on the tread and aligned the left newel with the center post. This adjustment changed the alignment with the newels upstairs, but it was a very short run with nothing else to compare against, so few people would notice the difference. The symmetry of the starting newels was more visible and important.
I planed, ripped, and jointed five pieces of 6-inch-wide fir to the proper thickness and width, then grooved them for biscuits. Each piece was scribed to fit, then they were all glued together and clamped in place. I started at the bottom with the piece that tucked under the landing and worked counter-clockwise. Next came the only full-length piece, which ran from the floor to the top of the 4x4 post, beside and above the lower flight of steps. The last three pieces sat on treads that formed the winder.
I dry-fitted everything together and checked the post for plumb in both directions, making sure that nothing was too distorted or bent. Once it all looked good, I disassembled, applied glue, reassembled, and clamped (7). I started at the bottom, making sure that the miter joints were tight and aligned, then worked my way up and around the post to the top.
 7A
7A
 7B
7B
I left the assembly clamped overnight. The next day I removed the clamps, scraped off the excess glue, sanded all of the surfaces, and routed the corners with an 1/8-inch roundover bit.
Installing the Boxed Newel Posts
There are two newel post configurations in this staircase, those that sit flat on the floor and those that are notched around the treads and risers.
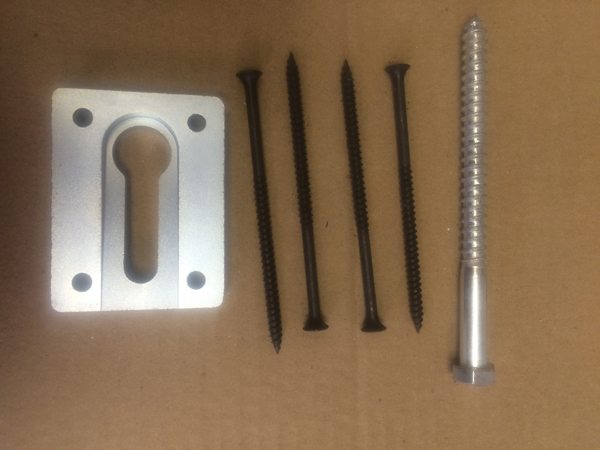
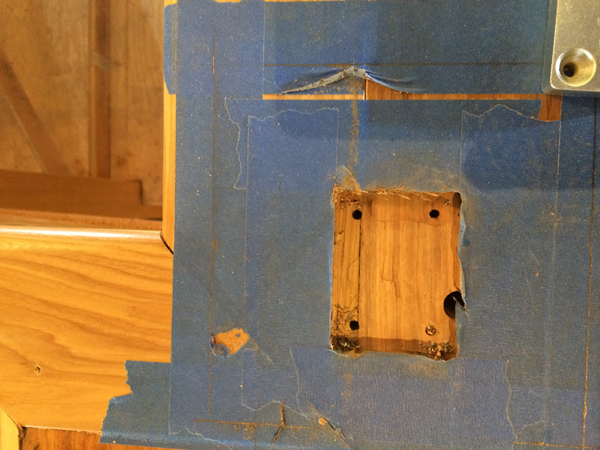
For the first type of newel posts, I used the Keylock Newel Post Fastener from L.J. Smith Stair Systems. This system consists of a metal plate with a sloped slot, a lag bolt, and four long screws (8). First, I laid out the newels around the stairwell and marked their location with masking tape around the perimeter (9). Then I placed the metal Keylock plate in the center of each post location and used masking tape around the outer edge to create an outline. With a ½-inch straight bit in the router, I set the depth to slightly more than the thickness of the plate. This would ensure that once the plate was secured it would be slightly below the floor surface, making for a tight fit between the newel post and the floor. With both hands on the router, I free-handed the mortise in the floor (10). Because the metal plates have a smaller radius on their corners, I had to slightly “over rout” each corner so that the plate would drop into the mortise and could be fastened with the four long screws.
 8
8
 9
9
 10
10
After mounting the plates, I screwed the lag bolts into the holes I had drilled earlier, leaving about a ½-inch space between the bottom of the posts and the head of the bolts (11). I turned the posts over and slid the bolts into the slot to check the fit and position. If the fit was too tight, I backed out the lag slightly. If it was too loose, I tightened the lag. When everything was where I wanted it, I used a rubber mallet to tap the posts into position, making sure that they lined up with the masking tape outlines.
 11
11
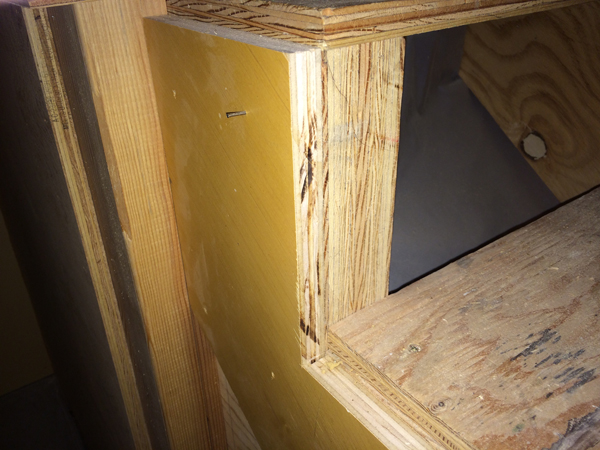
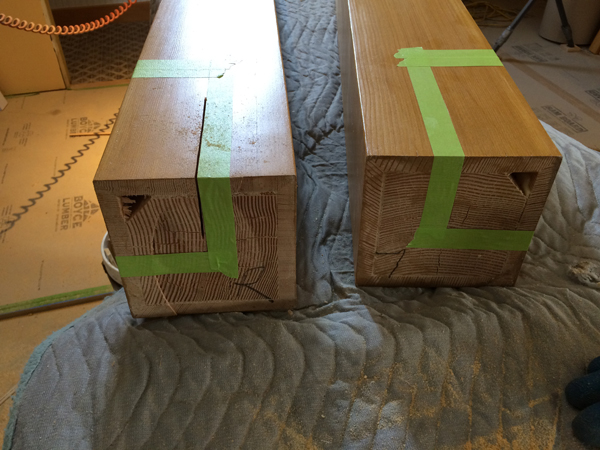
That took care of the top four newels. The other four newels needed to be notched around the stair framing. The two bottom, or starting, newels needed to have one corner removed so that half of the post would sit in front of the stair framing and half would sit beside it. This meant that I had to remove the back inside quarter of the newel, a 3x3-inch section approximately 7¼ inches long. The other two newels needed to have half of the bottom removed, a piece approximately 7¼ inches long and 3x6 inches in section. The remaining half sits outside the stair framing.
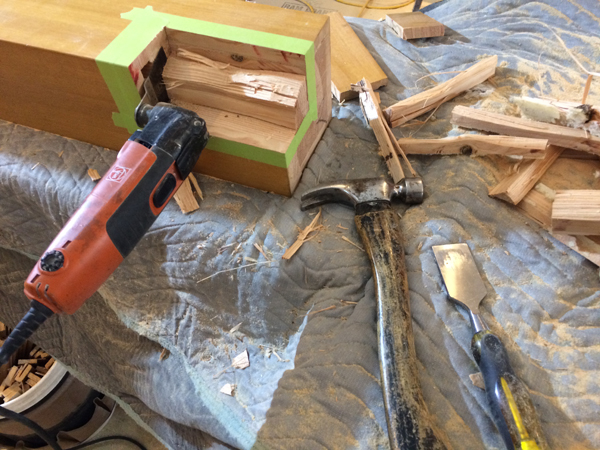
I used masking tape to mark where I needed to make the cuts because it was more visible than a pencil line and would eliminate chipping. I made the initial cuts using a circular saw and finished with a pull saw, an oscillating saw, and a chisel (12). Because the treads and risers were going to be fitted around the newels, the cuts didn’t need to be perfect, they just needed to be straight.
 12A
12A
 12B
12B
Once the material was removed, I positioned the newels and lag bolted them from the inside to the stair framing, making sure they were rigid and plumb in both directions, using shims where necessary (13).
 13
13
Installing Treads and Risers #TheHardWay
The treads for this staircase came from the same company that supplied the hardwood flooring. The treads were prefinished with a bullnose front edge and ends. The ends ran long, so they could be trimmed and mitered to return to the finish stringer.
But when the design changes after the parts are ordered, some of the parts don’t fit. In this case, the initial plan was to finish the stringers with ¼-inch wainscoting and no skirt boards. But now I was butting the beadboard against ¾-inch skirt boards, which meant that the treads were 1 inch short (½ inch each side) with pre-applied nosings (14). Fortunately, the nosing was 1¼ inches wide, which meant that I could rip ½ inch off the inside of the extended-end nosing to make the tread fit over the skirt boards at each side. The remaining ¾-inch overhang would be enough to look good against the skirt board.
 15A
15A
 15B
15B
 15C
15C
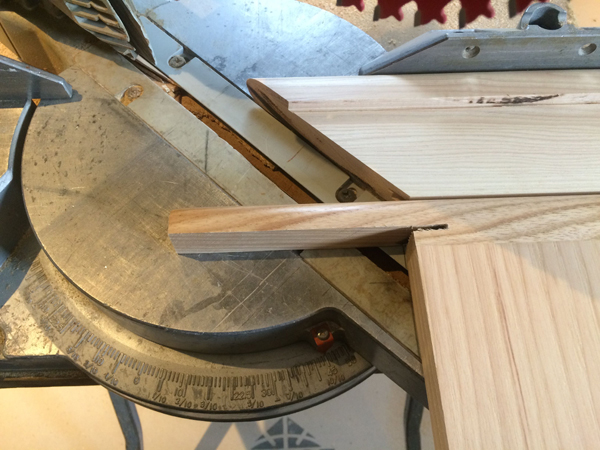
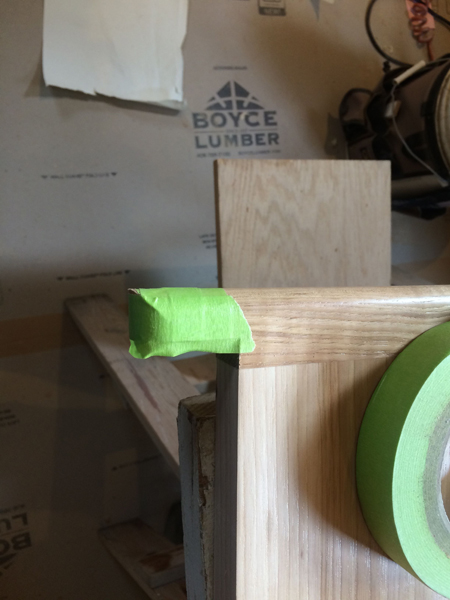
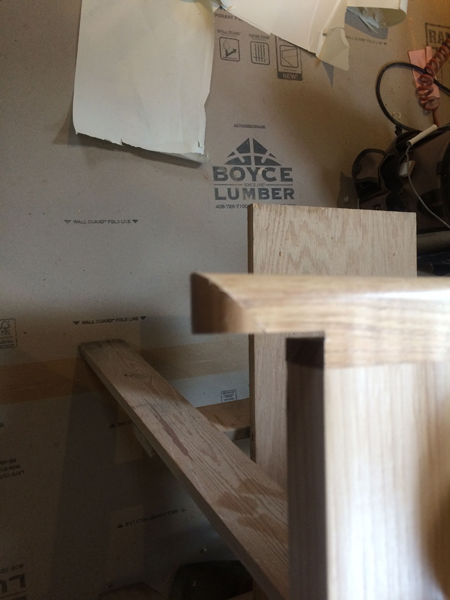
After using the table saw to rip ½ inch off the return nosings, I cut them at a 45-degree angle. To make the angle cut with my glide saw’s 12-inch blade, I had to space the tread out from the fence a couple of inches (15). I used a piece of flooring as a spacer against the fence to hold the tread nosing in position where the blade could cut cleanly through the miter without cutting into the tread. I glued the 45-degree return to the tread and “clamped” it with painter’s tape.
Next came the other challenge: The treads were too deep. Normally I would install all of the risers on the staircase first and butt the backs of the treads to them. I couldn’t do that here because the treads were ¾ inch too deep and would have left too much tread hanging over the front of the risers.
If the nosings hadn’t been pre-applied, ripping the treads would have been easy, but that wasn’t an option here. Instead, I opted to install treads first, rip down the risers, and set them on top of the treads; this would make the overhang 1 inch. Starting at the bottom of the staircase, I installed the first riser, then fit and installed the tread above it. I repeated this process all the way up, notching several of the treads to fit around the newel posts.
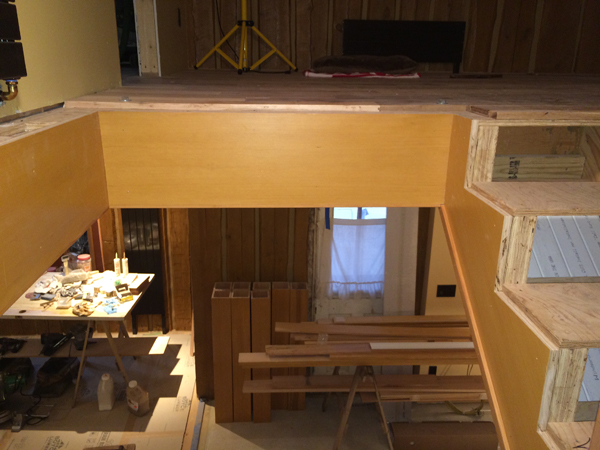
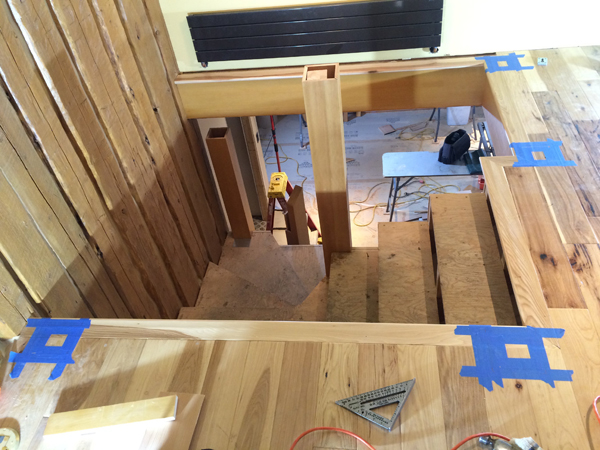
The two flights of stairs are interrupted by a winder formed of six pie-shaped treads (16). For these I used prefinished strips of nosing that I cut to length and installed after I had installed the riser below. I filled in the rest of the pie-shaped tread with strip flooring. Many of the cuts were at an extreme angle, so it took some fancy carpentry.
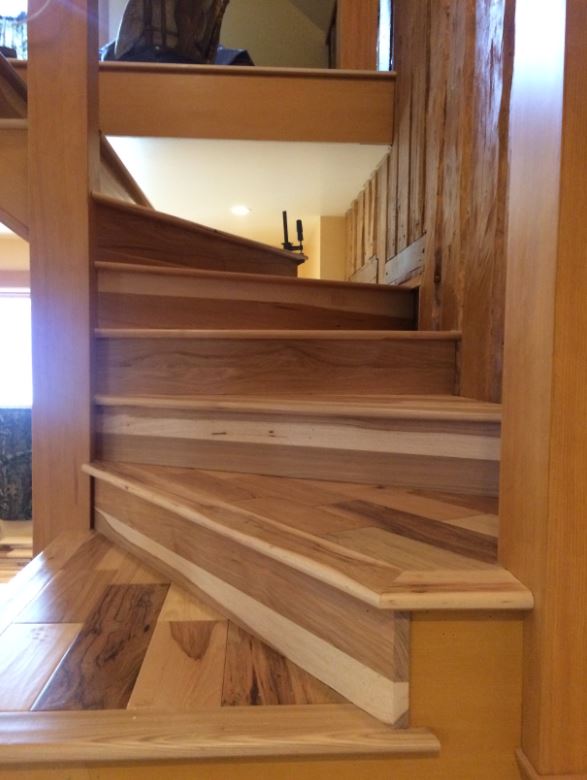 16
16
This section of the stairs took almost two days to complete due to the number of pieces and all of the custom cutting and fitting. The homeowners liked the sharp contrast of the flooring and asked me to match that look with the stairs wherever possible. Once the winder was finished, I completed the remaining treads and risers in a couple of hours. PR
---
Chris Whalen is owner of Black Mountain Co., a renovation, building, and woodworking company in Missoula, Mont. He is also a member of the technical advisory team for ProTradeCraft.com, a sister site of ProRemodeler.com.
A remodeler builds stain-grade custom newels and modifies prefab treads to complete a winder stair started by the homeowner
Add new comment
Related Stories

Power Home Remodeling Now Offers Subsidized Childcare
The home improvement giant's move seeks to address a greater industry issue

Contractor Facing Lawsuit in ‘Major Case’ by Ohio Attorney General
An Ohio custom builder and remodeler faces a lawsuit after alleged losses exceeding $1 million
 was a featured speaker at The Pinnacle Experience 2023. “The content they provide in a short amount of time really gets you thinking and gets you inspired,” said Tara Dawn, co-owner and marketing manager of Chicago-based window, siding, and door contractor Opal Enterprises.")
Learn from the Best in Home Improvement and Remodeling
This year’s Pinnacle Experience aims to help remodelers stay ahead of their competitors by featuring captivating keynote speakers and subject matter experts, collaborative roundtable discussions, and networking with proven players from across the country.

Registration Open for The Pinnacle Experience 2024
Register today for The Pinnacle Experience 2024 in Baltimore from June 26-28. Join the best and brightest in home improvement and remodeling for insight, advice, and relationship-building that will help you take your business to new heights.

Marvin Releases Switchable Privacy Glass Window
The privacy glass windows can be purchased from Marvin's Direct Glaze windows

Gas Ban in New Construction Considered by Chicago
The mayor-backed ordinance would impact all new construction

Working Toward Affordable, Resilient Homes
A new natural disaster protection act from NAHB aims to support hazard mitigation projects

The Remodeling Market Could Turn in Q4, Says Harvard
Repair and remodeling spending could see an uptick at the end of the year

Seattle Contractor Finds Grenade During Remodel
Polar Bear Construction Owner Vadim Kharkhavyy and the owner were equally shocked

New Independent Contractor Rule Faces Lawsuit
The Department of Labor submitted new criterion to judge when classifying workers