

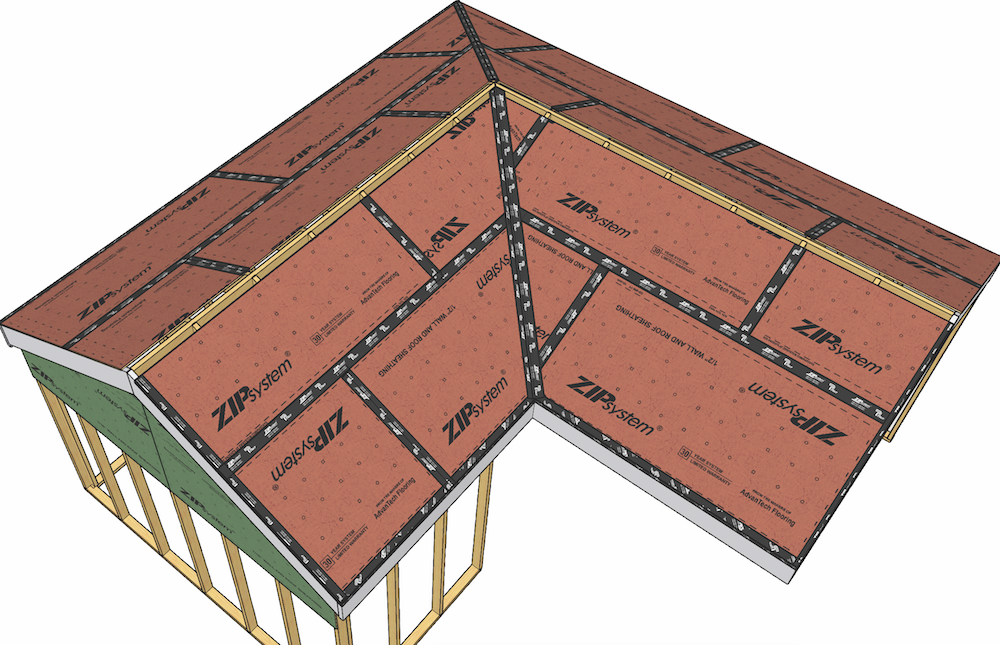
Roofs in high-wind areas are most vulnerable at the edges. Even if the shingles stay on the roof, wind can drive rain underneath the roofing and underlayment, and from there the water makes its way into the house at seams in the roof sheathing.
Taking steps to prevent this kind of damage begins with roof design. Hip roofs suffer less wind damage than gable roofs. Wind can push against a gable like it is a sail, and if there are gaps in the envelope’s air seal, it can pressurize the attic and blow the roof off from the inside. Hip roofs are better at deflecting high winds up and over, reducing the risk of wind damage.
Regardless of roof design, however, if roofing blows off during a storm, it’s important that the roof deck itself will remain watertight. Here’s a step-by-step description of how to install metal flashing, sealing tape, and peel-and-stick membranes to prevent roof leaks, especially in high-wind areas.
Edges and Seams
Start by sealing the perimeter of the roof deck and all seams between sheathing panels. To ensure proper overlaps, begin at the eaves and work toward the ridge (see “Get the Sequence Right").
Metal Drip Edge

Next, install metal drip edge over the taped eaves. The uphill leg should extend at least 2 inches up the roof (more is better) [1A]. For long runs, overlap seams in the drip edge at least 2 inches to meet code, and at least 3 inches for the FORTIFIED Home program [1B]. Start at the end opposite the direction of prevailing winds so that wind-driven rain will drain away from the seam.
At the rake, the lowest piece of drip edge should overlap the eave drip edge [2]. As with seams in eave flashing, seams in rake flashing should overlap by at least 3 inches to comply with FORTIFIED Home requirements. Nail all drip edge every 4 inches in a staggered pattern.


Valley Flashing
Lay metal valley flashing over the sealed valley, nailing through the metal only at the top [3]. At the edges, trap the metal against the sheathing under the heads of roofing nails. This will allow for movement with daily expansion and contraction cycles. Extra bends in valley flashing to create a “W’ shape also allow for expansion and contraction and can prevent overwash.
Tape the edges of the valley metal [4]. Optionally, you can also seal the drip edge to the sheathing at the rakes and eaves.


Shingle Starter Strip
Eaves need extra protection from water and ice for at least 2 feet, measured horizontally from the exterior wall toward conditioned interior space [5]. Depending on roof pitch, that usually requires using more than one strip of peel-and-stick membrane. To save on material, the second strip can be a half-width cut from a full roll.

Embed starter strip shingles in an 8-inch band of roofing cement at the eaves [6]. Use a double “storm-nail” pattern, nailing within 2 inches of the bottom of the shingles.
Storm-nail the first course of shingles following manufacturer instructions [7]. Extend the bed of roofing cement all the way up the rake to add extra protection at edge shingles.


Get more Jobsite Know-How here
Adapted from “Storm Proof Roof 2: Edge Flashing and Starter Strip,” one in a series of videos and animations about stormproof roofs produced by ProTradeCraft.com. Illustrations are taken from an edited version of a 3D roof flashing SketchUp Warehouse model built by Ben Richardson of Huber Engineered Woods, Inc. Thanks also to Mike Guertin for technical assistance.
— For more information, see the “Fortified Re-Roofing Checklist”
Add new comment
Related Stories

Josh Sparks: To Infinity (Exteriors) and Beyond
A roofer-turned-CEO who’s succeeding in his mission of up-leveling the industry

The Top Customer Expectations Contractors Must Meet in 2024
Hint: There are two vital things customers today expect that they didn't always think about

Business Coach Cited in Attorney General Lawsuit Against Contractor
A New England contractor faces a civil suit alleging his company’s growth was tied to a business coach with a model that “encourages fraud"

How to Stop Selling and Start Closing Sales
One of the biggest mistakes a salesperson can make is viewing the sales process as a one-sided transaction

Home Improvement Success: Luck, Hard Work, or Who You Know?
Even the most brilliant marketing mind could see fewer opportunities due to lack of networking

Homeowner Trends When Selecting Manufactured Stone
On this episode of Rock Stars of Remodeling, ProVia Product Manager of Stone & Roofing Chance Shalosky joins host Drew Barto to reveal design and color trends that contractors should consider when selling manufactured stone in 2024

Why A Successful Custom Remodeler Started a One-Day Bath Business
On this episode of Rock Stars of Remodeling, Showcase Remodels Owner Sam DeMaio shares why he decided to add a one-day bath business and offers tips on how contractors can accumulate wealth
 was a featured speaker at The Pinnacle Experience 2023. “The content they provide in a short amount of time really gets you thinking and gets you inspired,” said Tara Dawn, co-owner and marketing manager of Chicago-based window, siding, and door contractor Opal Enterprises.")
Learn from the Best in Home Improvement and Remodeling
This year’s Pinnacle Experience aims to help remodelers stay ahead of their competitors by featuring captivating keynote speakers and subject matter experts, collaborative roundtable discussions, and networking with proven players from across the country.

Get the Most Out of Your Teams with This Leadership Style
The transformational leadership style focuses on inspiring and motivating team members to achieve their full potential and exceed their expectations

3 Reasons Contractors Should Set Same-Day Sales Appointments
Director of Home Improvement Drew Barto writes that contractors that aren't implementing same-day sales appointments are missing out on opportunities to close more business